From late-night Cheeto-powered gaming to breakfast-sandwich-in-hand commuter computing, laptops attract a lot of dirt, dust, crumbs, and various other bits of their owners’ debris. Add to that the air circulation system inside your computer, usually powered by at least one fan, and it’s tendency to suck in dust faster than Hoovering the Sahara, and you have a recipe for a mess inside your laptop. Not surprisingly, computers don’t like this at all. From dust clogging the fan and causing your system to run hot (which burns out critical components VERY quickly) to sticky liquids causing shorts or acting as magnets for other dirt, a messy laptop can cause all sorts of very expensive problems. You would not believe how many customers bring us their computers only to discover that all of their problems could have been prevented with a good cleaning now and then.
Luckily for you, several of our brave computers have agreed to undergo surgery so you can see how it’s done.


Step 1 – The Tools
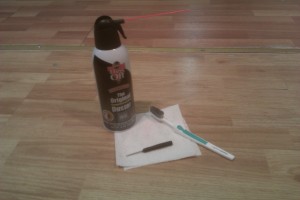
You need to gather up some basic equipment to do some good cleaning on your laptop. You don’t need anything fancy, but a good list will include:
- Bottle of compressed air, or better yet a static-neutral electronics cleaning gas
- Toothbrush
- Paper Towel/Napkin/Clean Cloth
- Rubbing Alcohol or Alcohol Wipes (not pictured)
- Screwdriver
Step 2 – The Outside
Though the outside may seem largely cosmetic, there are a number of things you can do to make a difference. Check the case for any sticky residue. This could attract dirt, and while it won’t do much damage to the internals, it can be a sign that you need to check inside for spills. Plus it’s just gross. Use an alcohol pad or some rubbing alcohol on your paper towel to clean it out. Check the keyboard for dust, dirt, and cookie crumbs. If you find any, blow them out with the compressed air. If there is any dirt between the keys that a few well-placed blasts of air won’t fix, use the toothbrush to gently dislodge them. If the keys are sticky, try the toothbrush with a little rubbing alcohol to clean the mess off. Also remember that keyboard keys pop off and back on with minimal effort. Pull up or pry at them with the screwdriver in a smooth, consistent fashion. Don’t jerk them or you might break the tabs that hold them in place. After cleaning them off, put them back into place and apply even pressure until they snap into position.
Step 3 – Peeling Off the Layers
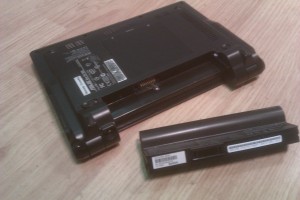
This is where we get to the meat of things. The first thing to do is to pull the battery off of your laptop. It’s usually held

in by two sliding tabs on either side of the battery. Once you take the battery out, inspect the connections on both the battery and laptop sides for any corrosion, stickiness, or dirt. If you find the first, take your laptop and battery into a repair shop immediately – you might have a battery leak! For the latter two, a quick but careful wipe-down with a toothbrush and alcohol wipe will take care of things.
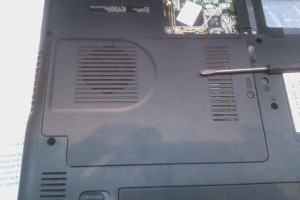
Now, locate your fan panel. It will be held in with one or more screws and will start right at one of the edges of your laptop with a fan exhaust port. Being careful to remember which screws

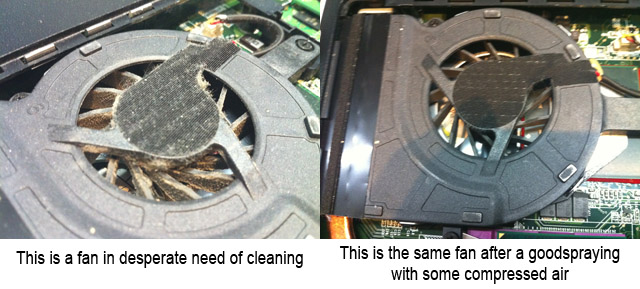
you’re taking out and where they go, unscrew this panel and pull it off. It should come off easily with no resistance, and if it doesn’t come off with a gentle tug, stop pulling and recheck for any screws you might have missed. Once it’s off, take a look inside: this is what makes your laptop tick. Examine the components inside for the usual: dirt, dust, and spills. If you find a spill, rubbing alcohol is again your friend. Being careful to stay away from the connections and exposed wiring, dab at the spill with an alcohol wipe and rub gently. Check your fan to make sure it spins freely and easily. If it doesn’t, take your can of compressed air and shoot a couple of strong but short bursts of air at it to clean any dust off. Then dust off the rest of the components, find the screws, and put everything back into place.
It’s not much, and you don’t need to do it often, but knowing the basics of cleaning your laptop can save you a lot of headaches down the line with expensive computer repair and sometimes replacement. You can extend the life of your laptop for a good bit just by following these couple of short steps once every 6 months or so. And if it’s too late and some damage has already been done, don’t panic: bring it to us and we’ll get it back to tip-top condition in no t.

